Mary, Mary, and Me: Essential Stitches and Seams, Part One

Mary Brooks Picken and her colleagues at the Institute faced a challenge: how do you ensure all students have a grasp of the fundamentals when your students range those who have never held a needle to those who already sew professionally in some capacity? After all, the Dressmaking and Tailoring Course had been pitched to women from all walks of life and would need to quickly address their concerns if the program had any hope of success.
The answer, of course, was to start at the beginning and deliver a heap of digestible, but essential background knowledge alongside the technical instruction. As Brooks Picken exhorts: “No matter how much experience any one may have, it will be advantageous to read the instruction matter carefully.”
To that end, Essential Stitches and Seams Part One is divided roughly in half. The first section introduces the various kinds of sewing needles and threads, followed by a selection of other notions. It discusses the care and use of both lockstitch and chainstitch machines, including parts, stitch formation, threading, operation, and maintenance. Fittingly, of the ten examination questions, half cover this material.
The second half turns its attention to the titular essential stitches and seams, including basting, running stitch, back stitch, combination stitch, overcasting, overhanding, and catch stitch.
This is not simply an instruction manual on how to form the stitches, but a thorough explanation on when and why to employ them. This approach, combined with the production of samples for review, helps to ground the technical instruction with practical use, a key tenet of the school’s instructional philosophy.
What worked?
In general, the written instructions for the stitches made sense. While it’s a stretch to say one could learn from the images alone, they were helpful more often than not. The explanation of machine felling was one of the clearest and most concise I have come across.
As a reasonably experienced sewist, I am also delighted to report that I learned hand sewing techniques that were new to me. I can already see a use for these stitches and was immediately able to put the combination stitch to work on my French seam.
Where did things get thorny?
Explanations are hard. Explanations are even harder when you can’t gauge your audience’s reaction and address confusion or misunderstandings. What works for one reader may leave another utterly lost.
All of this is to say that your mileage, should you choose to enroll yourself, may vary.
The explanation of how the lockstitch and chainstitch were formed was not accompanied by any diagrams or other illustrations. This same deficit plagued the instructions for ending off a line of stitching on a chainstitch machine. This made it very difficult to visualize the process as someone who relies on visuals to understand mechanical concepts. While this is somewhat mitigated in the case of ending off stitching (as one could theoretically follow along on one’s own machine), the difficult is harder to remediate on the matter of the stitch formation. Given that this is only lightly touched on in the lesson’s open-book exam, it’s likely that Brooks Picken understood that, while useful, this was not information that was critical to a student’s success.
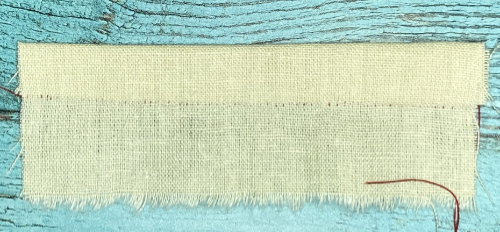
The first challenge came with overhanding. Faithfully, I basted the edges together. I took care to keep my stitches fairly even in length, appropriately tension, and just deep enough to catch the material. The challenge came in the form of my fabric, which began to unravel as I stitched, resulting in ugly, uneven stitches.
The polite word for this is “hideous,” in case you were wondering.
Ultimately, the edges of my first attempt did not lay flat and my fabric frayed so badly that stitches simply detached.
I decided I would try again. I kept my stitches even shallower and while my seam was flatter, it still wasn’t flat and I again fought fraying.
Again, the terms “ugly” and “unbecoming” come to mind.
Had I been a student of the Institute at the time of its operation, this would have been the point at which I would have enclosed my failed samples with a query and sought expert guidance.
Unfortunately, I’m about a century too late. So, I turned to Google.
My search yielded a very important clarification: that overhanding was performed with edges that had been folded over or otherwise finished. So, if you were attaching a bodice to a skirt, you would fold down the edges of both bodice and skirt, and then connect them using the overhand stitch.
I tried again, this time with two folded pieces of fabric. This provided enhanced stability that allowed my stitches to remain in place, prevented my fabric from warping or fraying, and ultimately resulted in that much sought-after flat seam.

Stitches could be a little more even here, but this is looking much better.
This was an absolutely critical detail, totally omitted by the text, which simply states: “Overhanding […] is used in seaming two edges together, usually selvages, where a flat seam is desired.”
The next challenge came with the catch stitch. While the instructions were clear and supported by an illustration, they didn’t make sense to make and the illustration, unlike some others in the lesson, did not include a making-of diagram or labels. Again, it was time to turn to the internet.

While the threads don’t show through on the other side, it’s clear I need more practice to really get the stitches even.
This was an interesting case to run into, as with a labeled diagram, it might have been avoided. There is also the small matter of needle directionality. The final instruction states: “Work from you, with the needle pointing to the left each time and continue to follow the row of stitches as shown.” Burying this crucial detail at the end separates it from the physical construction of the stitch, obfuscating a key point of instruction.
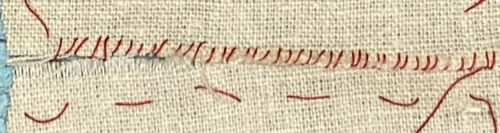
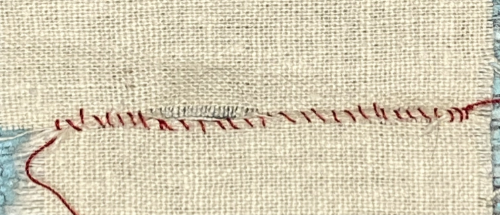
Hand hemstitching proved the next challenge. This is another case where additional photographs or illustrations would have been helpful for me, as a visually-oriented person. That said, even though I did again need to pursue other help, this was my favorite technique in the lesson — and was a hobby of Hollywood starlet, Jean Harlow, too!

In all honesty, I’d likely be docked points here as well for an uneven number of threads in each gathering and for the way the thread isn’t perfectly hidden on the far right.
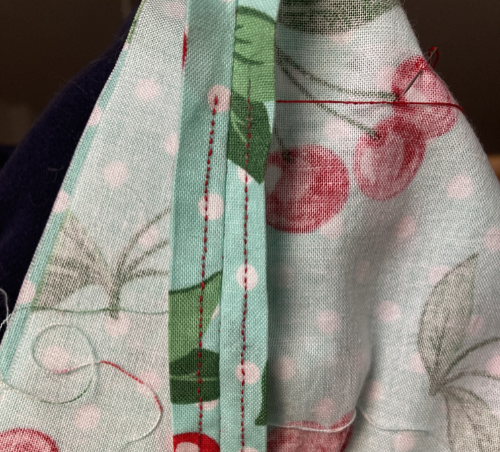
The French seam was an interesting case. Having previously sewn garments with French seams, I knew that the first line of stitching was made on the exterior of the garment with the wrong sides facing each other, and that the piece was then turned inside out and the second line of stitching completed on the interior.

Everyone loves a little roadside kitsch in their sewing.
No mention of this is made in the text and it’s not clear in the illustration. While this doesn’t necessarily matter for fabrics that don’t have a right side or wrong side, printed cottons were still in use at the time; absent a sufficient sample of period cloth, I can’t really speak to whether or not this was an omission at the time the text was written or simply not a concern.
The final challenge came in a detail of the feather stitch. The technical instructions and illustration were excellent but I still struggled to visualize how the center of the feather was supposed to be kept on the center line.

Yes, I’ll comment on how I would have been docked for even stitches again.
Was I able to use it?
I was able to immediately put the stitches to work. The instructions on basting stitches forced me to realize I habitually made mine too small. Correcting their size greatly sped up the process and I was able to employ basting with many of my samples.
In the case of the catch stitch, I was able to secure the facing and hem of a dress I had made on short notice to finally give it a more finished look.
Combination stitch helped me to repair a bra in far less time than my usual backstitch.
These were everyday tasks that I needed to complete. The stitches covered in Essential Stitches and Seams were immediately useful and gave me results that solved the problem while looking stylish and clean.
Is it instructionally sound?
Generally, one should take caution when contemplating goods and services advertised in magazines, especially in the 1910s and 1920s. There’s morphine! There’s placenta powder! There’s quack cures for epilepsy and tuberculosis! Everyone’s obsessed with laxatives! Everyone wants to sell you success, if you only just write to the address below!
But this one passes muster.
Structurally, this lesson makes sense. It introduces key terms and concepts and then begins with the most foundational skill (threading the needle) and gradually increases the difficultly, letting learners build confidence. Stitches are introduced followed by the hems and seams in which they are used. The flow is logical and self-reinforcing, which is exactly what we like to see in well-designed, well-scaffolded instruction. While this alone might not bring you immediate fortune and glory, it would give you a good grounding to progress.
While I did hit stumbling blocks, a sample of one is simply not representative and, at the time of the Institute’s operation, I would have been entitled to personalized assistance, including physical samples sent directly to me. This allowed teaching to meet the specific needs of the individual student as no extra fee was levied should assistance be required.
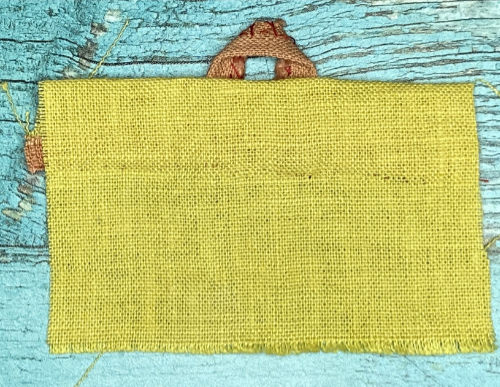
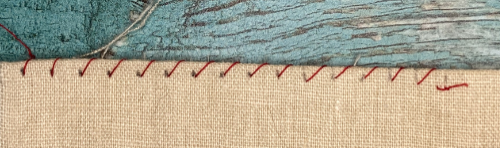
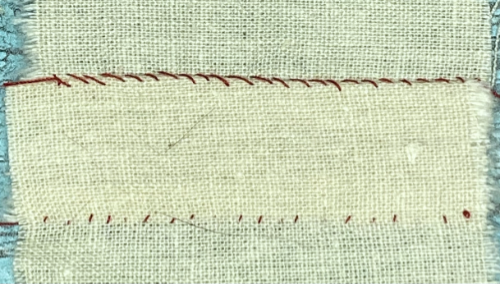
Attaching a hanger for a towel, though I’d use the same process for a dress.
Assessment hinged on ten questions and eighteen samples. While the assessment questions were, in effect, open-book, students still needed to demonstrate an understanding of the material to put it in their own words, helping to reinforce the concepts. The samples provided a concrete demonstration of technical mastery.
When the Institute first opened, a passing mark was 90%; however, by January 1920, that was lowered to 85%. Mary Hicks received a 94% between her written responses and samples, though those have not survived for review.
Let’s compare answers:
What tools are required in dressmaking?
Needle, thread, thimble, pins, scissors, shears, emery bag, tracing wheel, stiletto, tape measure, ripping knife
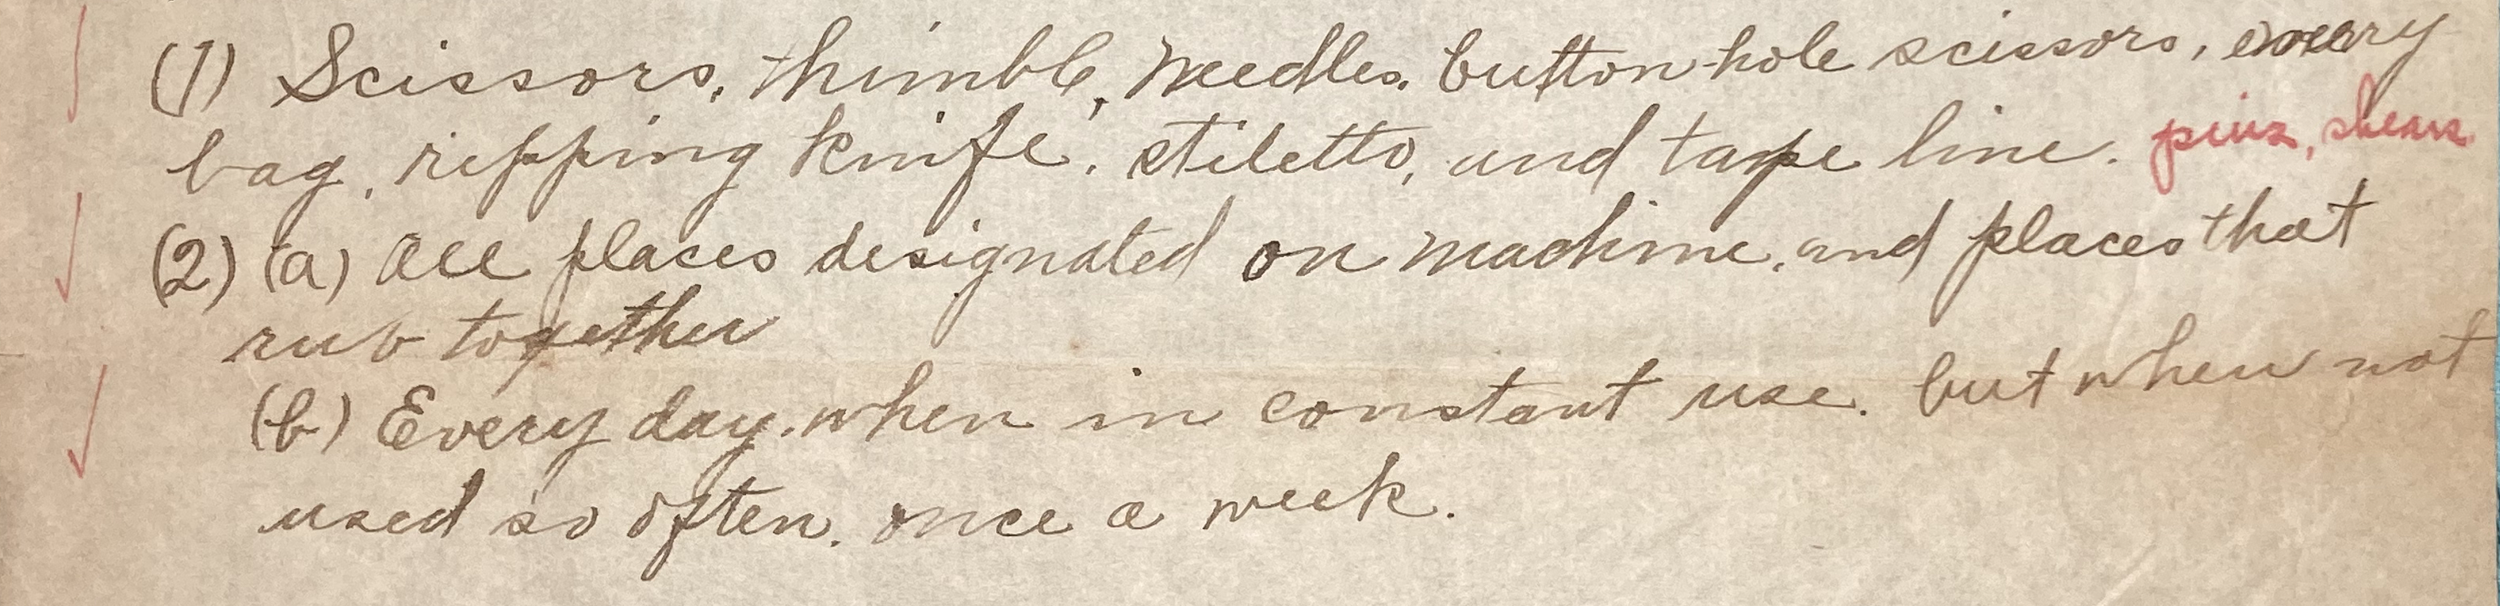
1: What parts of the sewing machine should be oiled?
All the places designated for oil and those that rub together.
2: How often should a machine be oiled?
In regular use – daily.
In lighter use – weekly.
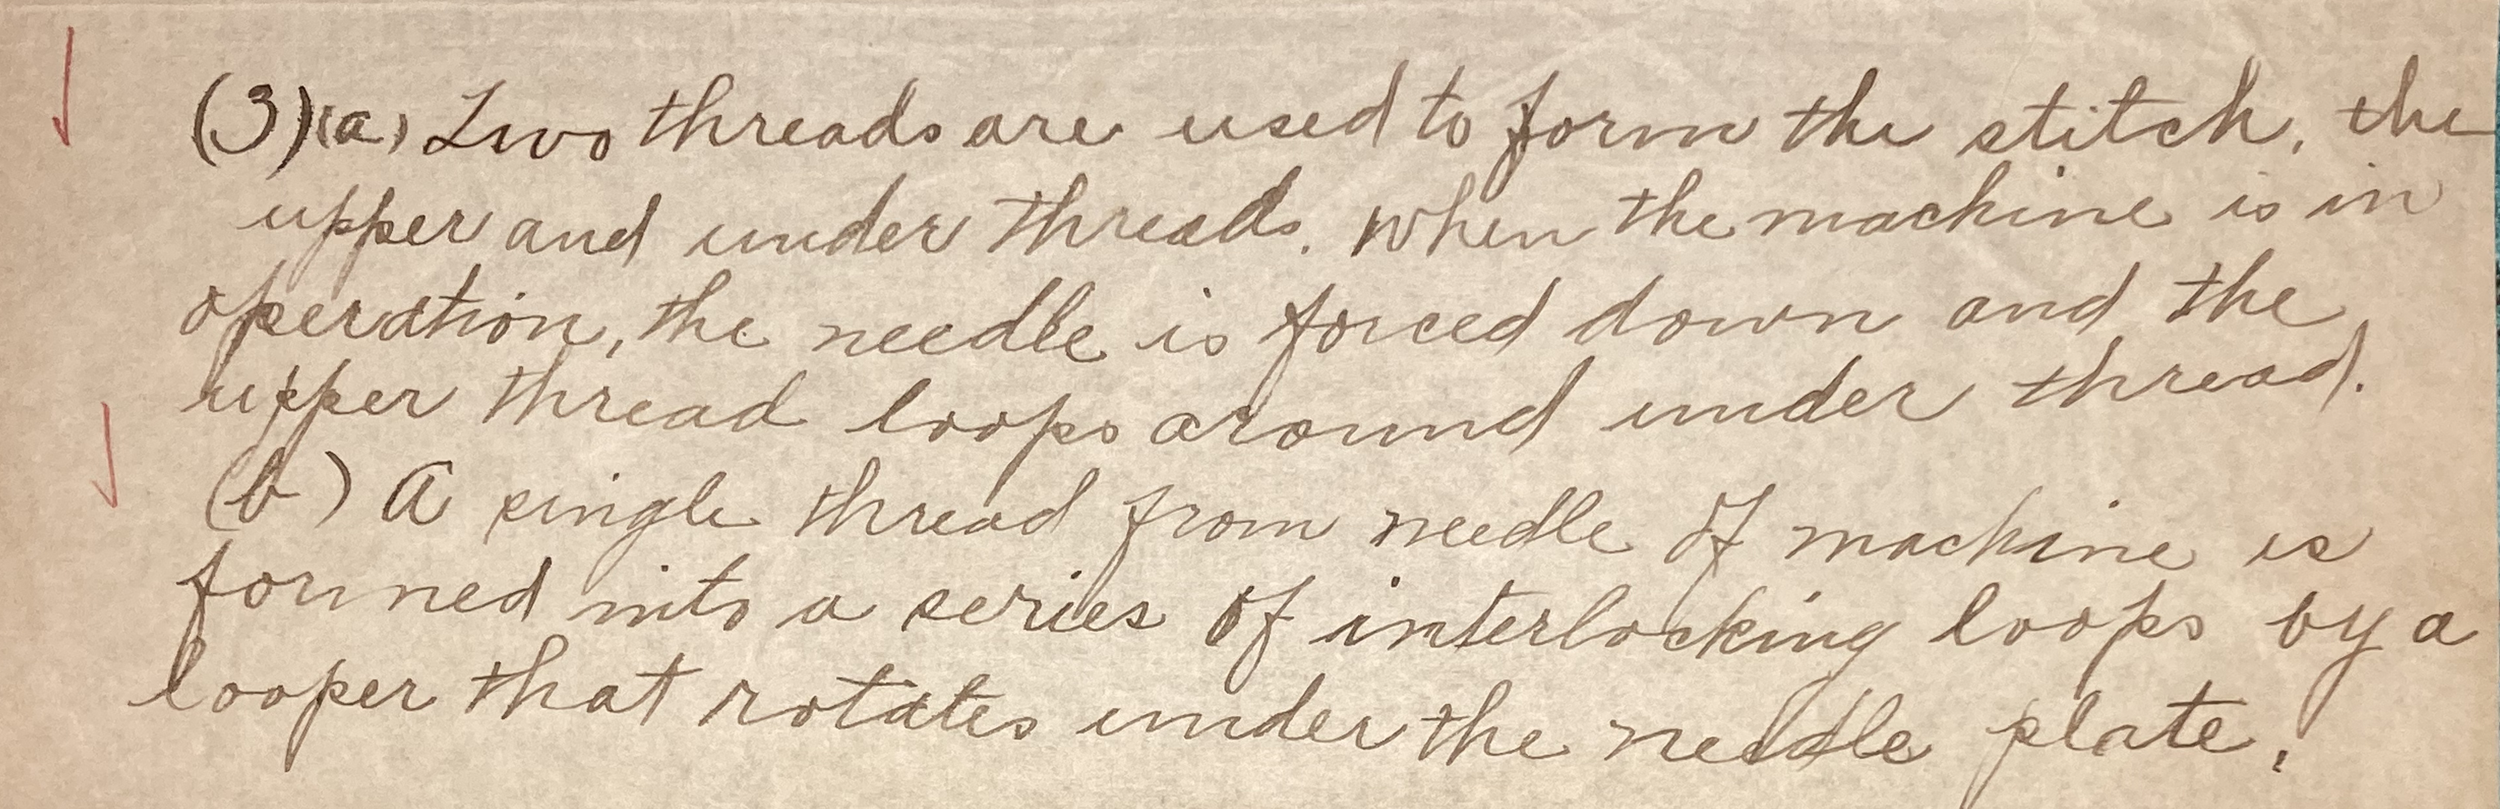
3A: Describe the lockstitch:
A lockstitch is formed when the needle thread is forced down and looped around the under thread.
3B: Describe the chainstitch:
A chainstitch is formed when thread feeds into a looper that rotates under the sewing plate, creating a series of interlinked loops or chains.

4A: Name the basting stitches:
Even,

Too small!

Looking better here.
Uneven,
One of my biggest lessons from all of this was that I cannot accurately eyeball a quarter inch.

Cannot understate the value of just measuring it!
Diagonal
Honestly, let’s not even comment on this one.
We all love rulers and Frixion pens.
4B: Name the foundation needle stitches:
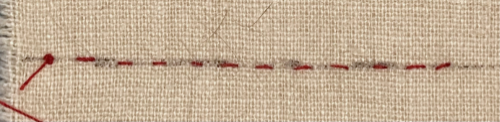
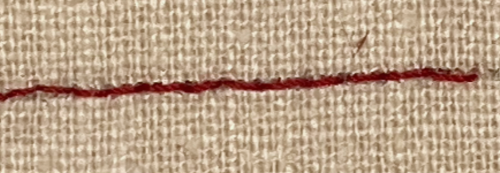
Running,
Alright, I’ve cheated and used a shot of my work-in-progress.

My sample, for good measure.
Back stitch,
I think this one might have passed muster.
Combination

Those wonky back stitches are a work-in-progress.
I likely would have lost points here for an incomplete answer.
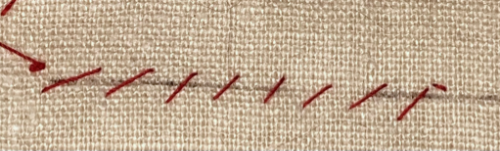
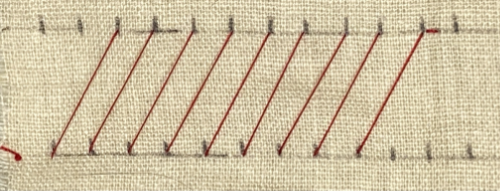
Overcasting — again, note the measured lines here. I’m used to putting these stitches much closer together.

My whipstitch — otherwise known as a demonstration of the importance of marking.

Looking much better on the French hem, but there’s still room for improvement,
Decidedly more respectable on the reverse.
5: Why should the frayed edges of a French seam be trimmed away before the last stitching is done?

To prevent them from poking out and showing through the finished seam. The finished seam must cover the raw edge entirely.
6: How many kinds of sewing thread are there?

Three: Cotton, Silk, and Linen
7: In purchasing a tracing wheel, of what must one be careful?

A tracing wheel should have sharp even points. Stubby points may damage the fabric.
8: What is the advantage of a machine fell seam?

A machine fell seam makes a flat, sturdy seam excellent for use in work garments, such as aprons, tennis flannels, and muslin underwear.
The rules state this has to be a hand-stitched example instead. Whipstitch and I are still having a disagreement.

9: What kinds of materials are suitable for the cross-stitch?
Plaids, stripes, and loose basket weaves are ideal, though voile, batiste, chambray, and gingham can be used with cross-stitch canvas.

Really, we could just title this one “Hubris.” Waste canvas would have made all the difference here.
10: What is the purpose of cross-stitch canvas?
Cross-stitch canvas allows to you create even stitches on plain material.

I’m not even sure canvas could have saved this one.
As someone whose sewing education was mostly informal, it was both fascinating and humbling to assess how I really would have fared as an Institute student. It’s clear that I have a lot of practice ahead of me — more than thirty lessons’ worth!
More seriously, it’s clear that the Institute and its staff were serious about giving students a proper technical education. Based on later lessons with surviving samples, the standards were high and students were expected to meet them. However, by allowing students to work at their own pace, the Institute balanced its demands with a flexible schedule, helping to prevent overwhelm and integrate thoughtful, purposeful practice in its students’ craft.